-
Uncategorized
-
Project Workflow: Project Budget, PR, PO, Vendor Bill, Payment
-
Maintenance Workflow: Project Costing, PR, PO, Vendor Bill, Payment
-
Default Workflow: Project Budget, Job Costing, Job Order, PR, PO, Vendor Bill and Payment
-
PR: Internal Picking
-
Dropship: Direct Deliver to Customer
-
Partial Receive Goods
-
Partial Vendor Bills
-
Purchase Revision
-
Reporting: PO with SO
-
- Common Issues and Solutions
Project Workflow: Project Budget, PR, PO, Vendor Bill, Payment
Project Workflow
Project > Budget > Purchase Requisition > Purchase Order > Vendor Bill > Payment
| Process | Project | Job Budget | Purchase Requisition | Purchase Order | Vendor Bill | Payment |
| Done By | Project Manager | Project Manager | 1. Project User Request 2. Project Manager Approve | 1.Procurement Create 2. Esther and John Approve | Procurement & Accounts | Accounts |
It is important to follow these steps:
| Video Guide | Purpose |
| Step 1: Create Project Budget | Step 1: Remember to "Add Budgetary Positions" under Invoicing > Configuration > Management > Budgetary Positions. This needs to be done by accounts. Step 2: Remember to "Set Product Expense Account" Step 3: Create Project Budget under Projects > Projects > Project Budgets to set the planned amount. |
| Step 2: Create Purchase Requisition | Video Part 1: It depends on the purchase requisition personnel where he/she can fill up basic information like product and quantity only and submit for approval. Video Part 2: Project manager will approve the purchase requisition. (Add Job Types video guide under Projects > Configuration > Job Types) |
| Step 3: Create Purchase Order or Internal Picking | Video Part 3: Only upon project manager approval, procurement fill in the information for vendors and submit the purchase request. For project, as there is no job costing, thus do not need to fill in job cost center and job cost line. Refer to this video for internal picking. "Video Part 3" shows the PO of vendor goods to JH warehouse. If you need to send the vendor goods directly to the customer, watch this video. Note: It's important to choose the correct approver.
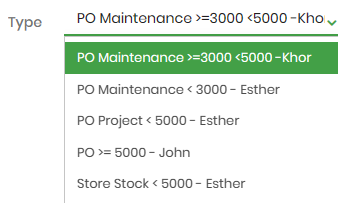
Video Part 4: John or Esther will approve the purchase order. Do note that it will remain in "Request for Quotation" until the order is approved then, it will be moved to "Purchase Order". Purchase order means it's a confirmed purchase.Video Part 5: Remember to select "Approval" to display the requestor and approver in excel. |
| Step 4. Receive Goods | There are 2 ways to receive goods, you can either receive at PO or receive at Inventory. For partial receive goods, refer to this video. |
| Step 5. Update Purchase Requisition Status | Update Purchase Requisition to Done. As there may be multiple purchase requisitions proceeding at different timing so it cannot be auto-closed off. Thus, after all the requisitions are done, you need to update to "Done" so that your colleagues will know this purchase requisition request is fulfilled. |
| Step 6: Create Vendor Bills and Payment | After your vendor gives you "Vendor Inv/DO", you can create "Vendor Bill" and register the payment. This will keep a record of whether you have fully paid your vendor. If you need to do partial vendor bill, watch this video guide. |
| Views | |
|---|---|
| 7 | Total Views |
| 7 | Members Views |
| 0 | Public Views |
Share by mail
Please login to share this webpage by email.
